Posts

Why I dont reccomend the best mouse in the world.

 Bought a Logitech MX master 3s mouse 2 and a half years ago. It was very expensive, but looked like a "mosue for life". It was everything I wanted in a mouse, as well as being a very good basic mouse, it had a great inertial scroll wheel, and the extra buttons worked brilliantly via their great windows app. But the best thing was, the multi device support works. For this first time in recorded history, I had a device that reliably roamed between 3 computers. I liked it so much that I invested in another "for life" splurge, the MX mechanical keyboard, which also has the perfect conectivity of the mouse. I also bought 2 more bolt receivers as I loved the eco system. Fast forward 2 and a half years, and the left button on the mouse stopped working. OK I thought, this is a young, premium mouse, logitech will sort me out. No. Their support bot eventually put me through to a human, and the first message I sent was " hi. i bought a mx master 3s in oct 2022 for 135 po...
SSD Upgrade on Lenovo Legion Go - Part 2 - Restore backup

Image
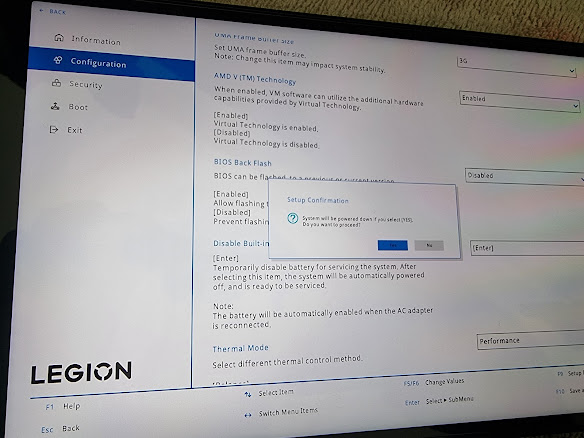
 TL;DR; - It worked perfectly as expected. 0. Prerequisites Same as part 1 2. Go into BIOS and disable internal battery (to disconnect the internal battery until external power is applied). Also disable secure boot. 2. Replace the SSD in the device. I bought one of these: https://www.amazon.co.uk/dp/B0C5YS3QY4?psc=1&ref=ppx_yo2ov_dt_b_product_details and the adaptor to make it long enough for the Legion Go https://www.amazon.co.uk/dp/B0BLJNGGVD?psc=1&ref=ppx_yo2ov_dt_b_product_details The hardware swap is well documented elsewhere. The hardest part was removing the foil from the old drive. 3. Insert the USB stick prepared earlier with Veeam and activate the boot menu (vol+ while power on, select boot menu. Also attach the large external drive with the backup image from before. 4. Boot from the USB stick prepared with Veeam 5. Wait for quite a while while it boots... 6. Pick bare metal recovery 7. Backup location - local storage... next... 7. Restore mode - entire computer (...

SSD Upgrade on Lenovo Legion Go - Part 1 - Backup the original drive using Veeam

Image
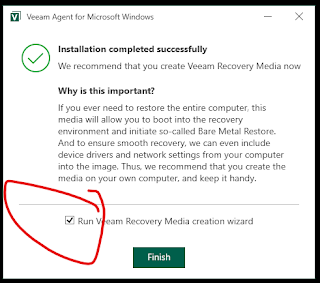
0. Prerequisites a) An adapter to allow you to plug USB devices into the Legion Go. I used this from Amazon: https://www.amazon.co.uk/dp/B09H44S96B?psc=1&ref=ppx_yo2ov_dt_b_product_details You might want to do some research on this - its doubled in price since I bought it last week, and its very slow (25Mb/s to the external SSD which can do 500Mb/s, but it might be the cage) If you buy this adaptor, make sure you plug the drive into the 1 out of the 4 USB ports that supports USB 3 :) b) An external drive big enough to hold the Legion Go SSD (in my case, 512Gb). I use a Samsung SATA SSD in a USB3 cage, since that is what I have. c) A Windows 11 iso. This can be downloaded from Microsoft (this is used to create the recovery media) The windows ISO is only needed if the computer doesn't have a recovery partition, which the Legion Go DOES, so this is not needed here. 1. Plug in a blank USB stick for the recovery media 2. Download Standalone Veeam Agent for Microsoft Windows here: ht...

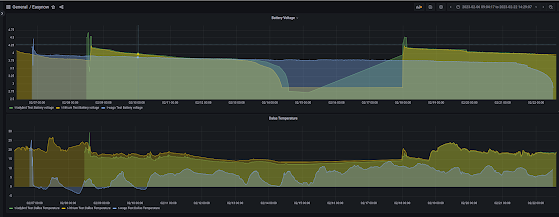
Wago is down - 500mah lasts 13.5 days reading the temp every 240s.

Image
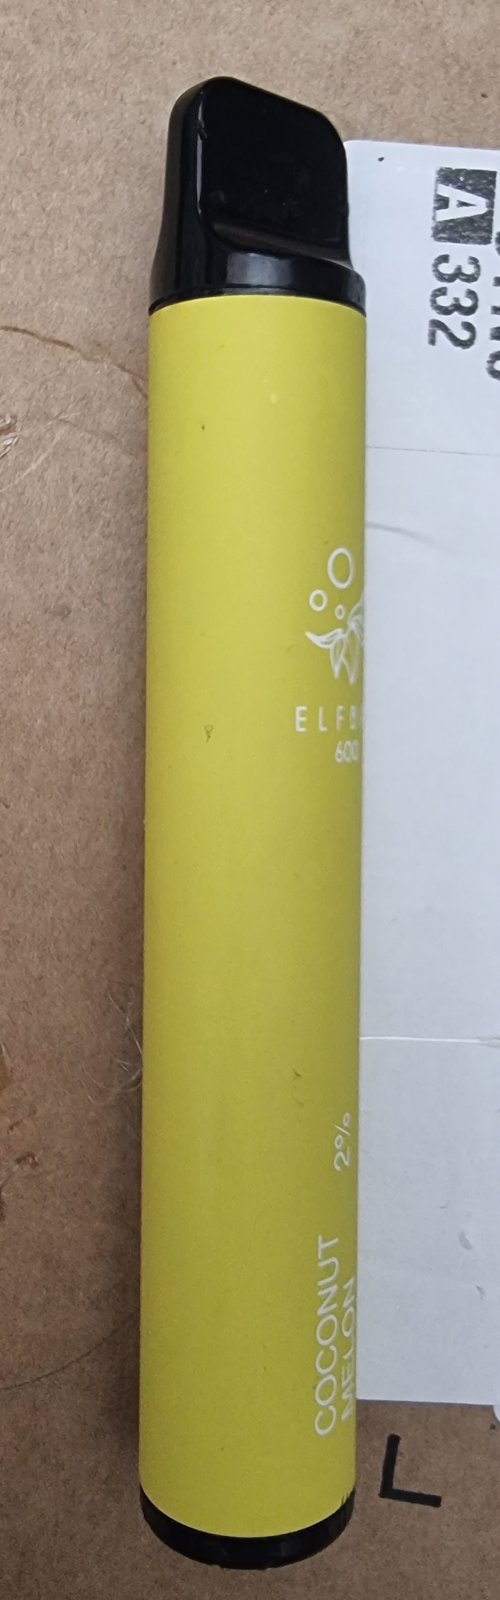
  The blue line is the AZDelivery device, measuring the temperature every 240s on a 500maH ecig battery. It lasted 13.5 days. Its now going into production with a brand new 3000maH battery pack.

Man down...

Image
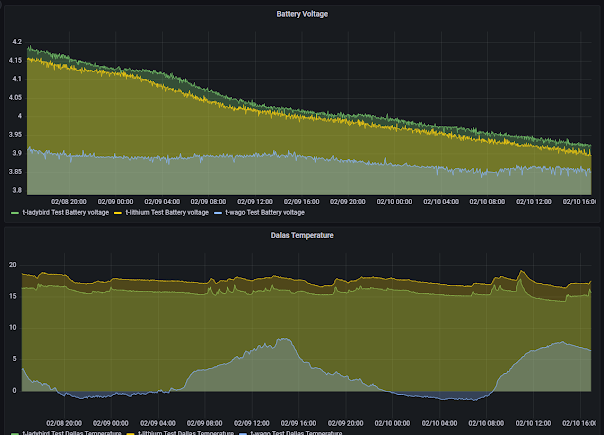
  Lithium is down after about 5 and a half days. This is the AZDelivery board with 70K potential divider, measuring every 60s. Ladybird (Firebeetle with 1M potential divider) isnt far behind. Wago (same as Lithium but measuring every 240s) is still on 3.78v after 8 or so days. These are all on a 500maH cell. conclusion so far: The Difference made by moving from a AZDelivery board and lower resister values doesn't make a huge deal of difference (half a day on about 5/6) The difference between measuring every 60s and every 240s is huge (not yet concluded) I will let this finish, then re-measure lithium and ladybird on a 240s schedule to see how they fare. edit: Ladybird is also down now, so the Firebeetle didn't really make a notable difference (nor did the higher resisters in the voltage measurement hack). We got an extra 5 hours on top of 5.5 days. It will be interesting to see if in a more sleepy (ie, every 240s) configuration the famed low power consumption of the Firebeetle ...

Race update

Image
Running the firebeetle (ladybird) and the AZDelivery boards, update every 60s (and also Wago which I didn't recharge before this). After 48h

Measuring the firebeetle

Image
Results (unscientific - should have done multiple tests)               Awake (ma)           Asleep (ua) AZDelivery board 70K dividers 130ma 115ma Firebeetle without low power link broken 70K dividers 130ma 462ma Firebeetle with low power link broken 70k dividers 132ma 84ua Firebeetle with low power link broken. 1M dividers 132ma 59.7ua So.. on the AZDelivery board I was seeing (at the battery input) Running current: 130ma Deep sleep current: 115 μa Measuring the firebeetle: Running current: 130ma Deep sleep: 462μa?????? Im not sure I trust my multimeter - i am inexperienced in measuring currents, and I suspect it breaks the circuit when it goes out of range, which makes it hard to measure micro and milliamps in the same rig. Trying another way - connecting a 4.7 ohm resister in series with the battery, and measuing the voltage across it, (measured reister = 5.1 ohms) Running: 660mv so I=V/R = 0.660 / 5.1 = 0.129a...

Passing though a USB3 PCI card in hyper-v so I can do full JTAG debugging in a VM

 By far my most powerful build box is my Dell R720 which im using as a Hyper-V  host. Ive got a lovely Wrover Kit dev board, which has on-board JTAG debugging, but to use it ive historically had to plug it into my laptop, and build there. The laptop is a 4 core i5, so it takes forever to build and deploy, and the progress is no fun. Ive managed to successfully pass though a PCI USB card to the virtual machine I usually use for ESP32 dev, and it works brilliantly https://community.spiceworks.com/how_to/189969-hyper-v-pcie-including-usb-pass-through-not-just-graphics-devices?from_category=22 PCIROOT(0)#PCI(0200)#PCI(0000) Dismount-VMHostAssignableDevice -LocationPath 'PCIROOT(0)#PCI(0200)#PCI(0000)' -force Add-VMAssignableDevice -LocationPath 'PCIROOT(0)#PCI(0200)#PCI(0000)' -VMName 'v-dev' This gives me full remote control of the device via both serial and JTAG. The only thing I cant do is see the screen, but I dont use that much.

The firebeetle arrives... ive called her Ladybird

Image
First impressions are very good. I wasn't expecting USB-C  (and its proper USBc that accepts PD or USB-A-C cables). Its also flashing an unexpected RGB LED at me. Its also got nice little pads for taking VIN from the USB and battery. How thoughtful :) And its even got an unexpected GDI display connector (not I hadn't heard of that either - something for wiki'ing tonight) Its flashed with empty ESPHome... looking forward to playing with it tomorrow. Even if the power thing is not true, this is likely to be my go-to board for production use from now on.

Wago current measurement

Wago seems to be drawing a lot more power than I expected in deep sleep mode.. Measuring on the battery input, im getting around 115  μa The accepted leader in the low power ESP boards, the firebeetle, is said to draw 15 μa (likely at the 3.3 rail, not battery input), so I am losing 100 μa somewhere... (It seems to draw around 130ma during its waking phase, which is what I was seeing before. Removing the voltage divider brings it down to 88 μa , so this is still 70 μa more current (although I suspect the measurements for that were done on the 3.3v, not before a battery circuit. So im wasting about 20-30% of the energy on the voltage divider. Time to look into being smarter than that. Im reading 0.01mv across the pull-up, so using ohms, we are wasting sod all with the 47k (unless my calculations are out, its 2.12 x 10 to the minus 13...)

And so "Wago" was born. A repeat of the last device, held together with Wagos so I can measure things...

Image
 One I found today Opened with pliars These things are smaller than I thought - only 550mAh Good old leaded solder   The trusty USB iron What could possibly go wrong? Building up

Introducing Easynow - an ESPHome component to make sensor proxying via ESPNow easy in ESPHome.

Image
I think my ESPNow proxy components are now working well enough to release. https://gitlab.com/ripnetuk-public/espnow/ripnetuk-esphome-easynow It can be used in ESPHome simply by adding YAML, since ESPHome can pull external components direct from a Git repo - well done ESPHome :) Initial tests are good - using the same device that I was getting roughly 8 hours out of (from a discarded [popular device] - 700maH),  On previous measurements, I was timing the main part of the discharge curve, from 4v down to 3v, and was getting approx. 8-9h of runtime. This was taking a reading every 60s and passing to HomeAssistant via the regular API (ie, using the built in ESPHome stuff) BEFORE Easynow So it was taking between ~18:00 to ~02:45 to discharge from 4v to 3v. Thats about 8/9 hours. WITH Easynow Well, this is awkward. Its worked so well that after 8 hours, it havent even yet got down to the 4v ive been testing at: yet its still successfully reading the temperature every 30s: So far, id cal...

Emergency safe mode on ESPHome and ESP32 (re-using EN button on GPIO0)

 The GPIO0 'enable' button is usually only used at boot to put the device into flash mode. After it has booted, we have a spare physical button on most dev boards. We can use this to flag that ESPHome needs to go into safe mode (ie, not run any components other than wifi and ota). We need to add an ID to the ota component: ota :   id : theota   password : "(readcted)" Then add the following YAML globals :   - id : press_ms     type : int binary_sensor :   - platform : gpio     id : failsafe     pin :       number : 0       mode :         input : true         pullup : true       inverted : true     on_press :       then :         lambda : !lambda |-           id(press_ms) = millis();     on_release :       then :         lambda : !lambd...

Now thats what I call ESP...

 These ESP devices feature a wireless tech called ESPNow. It basically lets you send a UDP type packet from a ESP to another ESP (by MAC address) up to (i think) 256 bytes, but its low power, since it doesn't need to establish a connection to a Wifi base station. So.... my goal is to create 2 ESPHome components, called something like ProxySensorReveicer and ProxySensorSender. On the battery powered device, you you run ProxySensorSender, and have a config like sensor:     - id mySensor       platform: adc (etc) ProxySensorSender:     -  receiver: 11:22:33:44:55:66     - sensors:         sensor:             proxy_id: battery_voltage             sensor: mySensor then on a grid powered receiver you would have ProxySensorReceiver:     senders:         - mac: 22:33:44:55:66           sleep_period: 10m ...

Lucky tac-tac box size moment...

Image
 Board with battery sensor added